Wednesday, August 27, 2014

Water Color Painting Tip #5 - Sealing Your Finished Painting

Water Color Painting Tip #5 - Sealing Your Finished Painting
I used Krylon Fine Art Fixative to seal in this little painting.


Watercolor Painting on Gesssoed Hardboard
By Pamela Queen

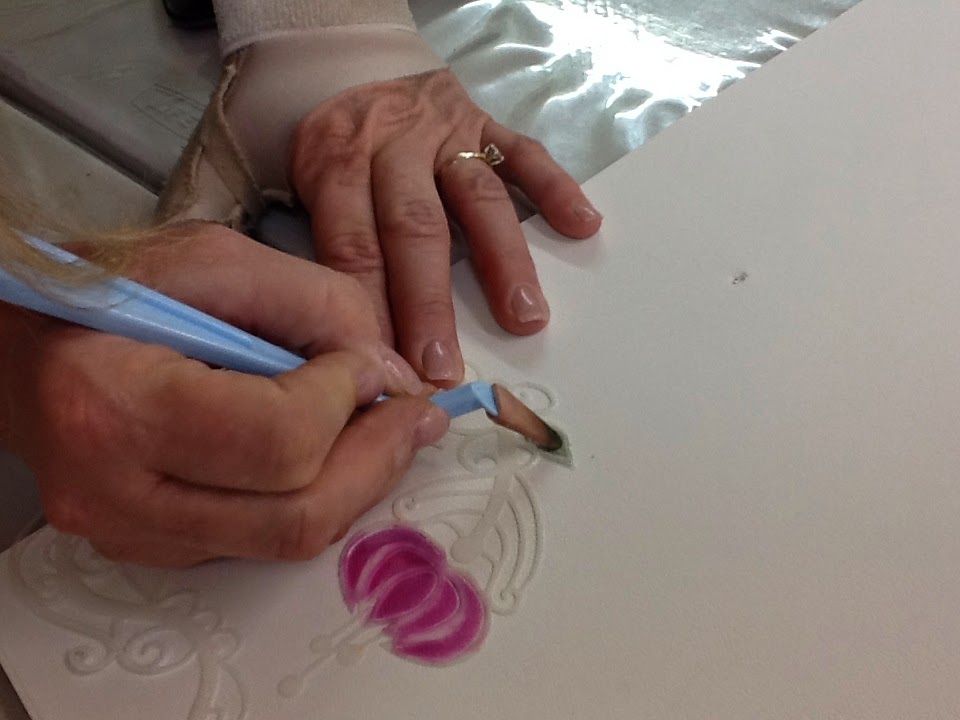
I wanted to test out this great new product by Jack Richeson, Gessoed Hardboards. I wanted to see if it would accept watercolors easily. I used Daniel Smith watercolors, & Niji water brushes on the 4" x 4" tinted Natural White. 


ScrappyCraft 511 N Main St. Phoenix OR 97535 (541)512-0040
www.scrappycraft.com
shop.scrappycraft.com

Scrapbooking~Card Making~Paints~Pastels~Book Making~Drawing & Sketching~Jewelry Making~Calligraphy~Polymer Clays~Wood Burning~Encaustic~& So Much More!


Wednesday, July 9, 2014

Jewelry Making Tip #2 Making a Wire Spiral with Artistic Wire

Making a Wire Spiral with Artistic Wire 

 by Pamela Queen

Needle Nose Pliers & 22 ga Artistic Wire
Needle Nose Pliers, Semi Flush Cutters, Flat Pliers, (or nylon saw jaw pliers)
Begin by cutting off a section of wire approx. 7" long.  Using the needle nose pliers grab one end of the wire with pliers, and bend the wire around the needle nose.
  You should have this when done with this first step:


 Next Step: Use needle nose pliers to grasp the small loop you just made, and bend the wire around the small loop. 


Next Step: Using Flat Nose, or Soft Jaw Pliers
Grab the small circle loop you just made, by it's edge like so.
Next begin wrapping the wire around the spiral,  
pull the wire around, and adjust your grip on the pliers as you wrap around.
Keep working your way around until you have reached your desired size of spiral


ScrappyCraft 511 N Main St. Phoenix OR 97535 (541)512-0040
www.scrappycraft.com
shop.scrappycraft.com
Scrapbooking~Card Making~Paints~Pastels~Book Making~Drawing & Sketching~Jewelry Making~Calligraphy~Polymer Clays~Wood Burning~Encaustic~& So Much More!

Friday, June 27, 2014

Acrylic Painting Tip #5 Never Use Solvents


Never use solvents like turpentine or white spirits when washing your brushes. Acrylics don’t require anything more than water and soap. You can follow up with a nice brush conditioner/preserver like 'The Masters". Solvents such at Natural Turpenoid, are used when cleaning oil based paints out of your paintbrushes.

Thursday, June 26, 2014

Jewelry Making Tip #1 Enough Tools

Do you have enough Tools,  You can never have enough tools for jewelry making. Here are a few of the basics.
Good Flush Cutters, Round Needle Nose Plyers, Soft Jaw Nylon Plyers
Chain Nose Pliers.


Card Making Tip #5 Tri-Fold Cards

          Double-Fold Cards
Next time you are ready to design a card, try using this style of fold.  Embellishing with a nice
ribbon to tie the card shut is a great way to dress it up.


Wednesday, June 25, 2014

Pastels Tip #5 Pan Pastels with Applicators

 Pan Pastels with Applicators


Pan Pastels with Applicators
With a Stencil the Applicators get those tiny spaces

Applicator Sponges
Cleanup with applicators is easy, just blot on a paper towel
Pan Pastels Clean up Easy with Steadler Eraser
Pan Pastels For Sale At ScrappyCraft


Oil Painting Tip #5 How to clean dried oil paint off your brushes

Cleaning Dried Oil Paint Off Your Brushes. 
By Pamela Queen


  Soak your dried dirty brushes in an Acetate Nail Polish Remover for 2 to 3 minutes, then follow up with Natural Turpenoid for the stubborn dried paint. Repeat as necessary. 
Finish up with a good brush soap & preserver.

Friday, June 20, 2014

Pastels Tip #4 How to Keep your Pastels Pristine

   How to Keep your Pastels Pristine?
By Pamela Queen

  If you are like me, I have spent quite a bit of money on my wonderful Pastels, yet did not know how to keep them clean.   My wonderful boss De informed me of her way of cleaning her Pastels. Clean them with flour! Yes, add just a bit of rice flour to a plastic container, and place your pastels in the flour, and gently shake/agitate the plastic container until you see that your  little Pastel sticks are all clean.  Works like a charm.


____________________________________________________________________
https://www.scrappycraft.com/

Thursday, June 19, 2014

Card Making Tip #4 Decorate the Backside


The Backside is always forgotten when it comes to designing cards.
Why not incorporate your own little logo or a "this card created by....."


Add distressed edges, stickers, and other embellishments to help tie in the designs that you have on the front and insides of your card.
 

Drawing & Sketching Tip #4 What Eraser to use?


What Eraser to use?
By Pamela Queen
Different paper types, different pencils require different erasers.
The History of the eraser.
"Before rubber erasers, tablets of rubber or wax were used to erase lead or charcoal marks from paper. Bits of rough stone such as sandstone or pumice were used to remove small errors from parchment or papyrus documents written in ink. Crustless bread was used as an eraser in the past; a Meiji-era (1868-1912) Tokyo student said: "Bread erasers were used in place of rubber erasers, and so they would give them to us with no restriction on amount. So we thought nothing of taking these and eating a firm part to at least slightly satisfy our hunger."[1]
http://en.wikipedia.org/wiki/Eraser